Jump to content

Welcome to TheMalibuCrew!

As a guest, you are welcome to poke around and view the majority of the content that we have to offer, but in order to post, search, contact members, and get full use out of the website you will need to Register for an Account. It's free and it's easy, so don't hesitate to join the TheMalibuCrew Family today!

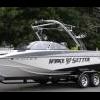
SeaDek Install


BSUBU_Kris

Recommended Posts

Had the boat home for a few days and was able to add some traction to the top side of the Bu. I ordered a large sheet of the SeaDek black 5mm traction padding. This matches the padding on the walk over on the rear deck very well except for being a bit thinner. I went with the black vs. the sand color that they used on the walk over; although, the walk over traction pad is two tone with one being black. Very happy with the final result.

Picture of the bow:

DSC_8155.jpg

Another shot of the bow in the water:

DSC_8194.jpg

Picture from the stern. I added the traction pad from the rear of the tower to the stern.

DSC_8197.jpg

I also added a piece that covers the area behind the rear storage compartments under the rear hatches. This was already getting scratched plus now you can step there when they are open without worrying about slipping. Forgot to get a picture of that.

I also added some to the trailer. Here are a couple shots of that as well as the new bow roller.

DSC_8222.jpg

DSC_8225.jpg

I also put a couple pieces on the fender behind the diamond plate. That part of the fender was also already getting scratched.

Kris

Link to comment

I had the hydroturf on my Centurion. I had that boat 11 years and it still looked great when I got rid of it. Decided to go with the SeaDek this time to match what was already on the walk over from the factory. Wish SeaDek made a precut kit for the Malibu's as it was a pain to install. Made paper templates for each piece then taped those to the SeaDek and cut them out with a knife. I then trimmed the edge of each piece with a razor blade to get about a 45 degree angle on all the edges.

Looked into the factory Decktrak kit Malibu offers but that material really isn't very soft. A bit softer than that sand paper stuff you get at Home Depot but not near as soft as the SeaDek. I saw an Axis with the factory traction kit at one of the boat shows.

Kris

Link to comment

Parking lot in the B&W Resort looks empty :rockon: I bet the water is cold what 59 degrees?? Did you have a lot of wood floating in the water in the Delta??

Link to comment
  • 2 weeks later...

That looks great :thumbup: I have been looking into some traction option but haven't been to excited about anything I have found so far, expect this one. Did you order directly from SeaDek? The rear hatches are a great idea too. How much material did you end up using on your install?

Link to comment

I ordered a large sheet of the 5mm padding directly from SeaDek. I used about half of the sheet. The large sheet was nice as it was long enough to cover from behind the tower to the transom and the area under the locker with one piece. The portion under the lockers is nice because I do find that I step there a lot when getting stuff in and out of the rear lockers. I really like having the traction pad behind the tower as that portion gets stepped on a lot.

I made paper templates for the bow section and under the hatches which I then used to cut the final SeaDek pieces once I was happy with the fit of the templates. On the bow and the hatches I folded the template in half for the final trim to make sure both sides where the same. It would be nice if they offered a pre-cut kit, that would make the job really easy. I would have paid at least double for a pre-cut kit. I looked at the one Malibu offered but didn't care for the material as it was more like soft sand paper vs. a nice padding like the SeaDek material. The texture of the SeaDek material is the same as the swim platform and walk over on my boat.

Kris

Link to comment
  • 10 months later...

Kris,

Where did you see the one that Malibu offers? If it comes pre-cut, I may go that route???

I ordered a large sheet of the 5mm padding directly from SeaDek. I used about half of the sheet. The large sheet was nice as it was long enough to cover from behind the tower to the transom and the area under the locker with one piece. The portion under the lockers is nice because I do find that I step there a lot when getting stuff in and out of the rear lockers. I really like having the traction pad behind the tower as that portion gets stepped on a lot.

I made paper templates for the bow section and under the hatches which I then used to cut the final SeaDek pieces once I was happy with the fit of the templates. On the bow and the hatches I folded the template in half for the final trim to make sure both sides where the same. It would be nice if they offered a pre-cut kit, that would make the job really easy. I would have paid at least double for a pre-cut kit. I looked at the one Malibu offered but didn't care for the material as it was more like soft sand paper vs. a nice padding like the SeaDek material. The texture of the SeaDek material is the same as the swim platform and walk over on my boat.

Kris

Link to comment

I am pretty sure it is still an option it was called something like topdeck traction. My dealer told me it was around $450 plus install. I think $450 is the minimum they can charge for any option. :)

Here is a picture I took at one of the boat shows last year. This was an Axis but they told me the Malibu was the same material. I really didn't like the looks of it as it looked and felt kind of cheap (just my opinion our mileage may vary).

18a44f9b.jpg

5e36d169.jpg

Kris

Link to comment

I think having it pre-cut would be worth it to me. I like the SeaDek better but don't want to deal with the cutting and design.

Almost looks like sandpaper!

I am pretty sure it is still an option it was called something like topdeck traction. My dealer told me it was around $450 plus install. I think $450 is the minimum they can charge for any option. :)

Here is a picture I took at one of the boat shows last year. This was an Axis but they told me the Malibu was the same material. I really didn't like the looks of it as it looked and felt kind of cheap (just my opinion our mileage may vary).

Kris

Link to comment
  • 2 months later...

Had a chance to get a couple pictures of the SeaDek install under the rear hatches.

DSC_8248.jpg

DSC_8249.jpg

On from the rear at the dock.

DSC_8259.jpg

Kris

I keep my rear lockers just like yours - jackets on starboard, bumpers and tube on the port side, and ropes in the tray.

I love the seadek under the covers. that portion gets real slick if you need to step through there. Someone might slip and wind up on their butt on the swim platform. That seems like it would hurt :whistle:

Link to comment

I did the same on my new TXi....SeaDeck is really good stuff.

I made templates and then cut and placed it along the deck. It looks good and works great.

I ordered a large sheet online. I'll have to get a better picture of the side rails. See attached pic of the bow section.

John

post-9170-0-87006900-1337217524_thumb.jp

Link to comment

I did the same on my new TXi....SeaDeck is really good stuff.

I made templates and then cut and placed it along the deck. It looks good and works great.

I ordered a large sheet online. I'll have to get a better picture of the side rails. See attached pic of the bow section.

John

Nice work!

Link to comment

I bought mine directly from SeaDeck's online store. I also just added about a 4" strip on the stern just above the swim platform as I noticed I was getting a lot of scratches from people putting their boards and skis on. I didn't have any scratches higher than about 3" above the platform. I also finished off the top deck with strips between the tower and the windshield. I have found that I step there a lot when pushing off a dock while I am the one driving. Put 125 hours on the boat last year and the SeaDeck material still looks new.

Kris

Link to comment

Man does that look nice. I want to do the same on my boat but I doubt I can get them as perfectly straight as you did and don't want to have any crooked areas because it's all i'll see. Luckily I'm the only one that boards the nose because i drop it in the lake, everyone else gets in prior to the boat being dropped in. The idea with the traction under the lockers would also help the issue I have where the vinyl material likes to stick to the gel and make it a little tough to lift it up sometimes. That would be the reason I would install there. If seadek had a templated option I would certainly buy it (assuming it wasn't ridiculously priced).

GREAT JOB on it.

Link to comment

The only hard part was the top deck around the bow. I taped a piece of butcher paper to the curved part around the seating area and used a marker to freehand the template. After I cut out the template I taped it back on and made a couple final,cuts to the template. I used the same template for both sides, just flipped it over for the opposite side. It wasn't perfect but I only notice it if I am looking for it. The front part of the bow was pretty easy. I taped butcher paper over that section and used a marker to trace the area I wanted covered. Once I cut it out I folded the template in half and did a final trim to make sure both sides were exactly the same. I used the same technique for the rear storage lockers. The rest I just used a tape measure to determine the length and width and was able to use a long straight edge for the cuts. If you want to do it well plan on a half day. I didn't think to keep the templates. :(

I also used rubbing alcohol to prep the area before sticking them to the gel coat.

Link to comment

Join the conversation

You can post now and register later. If you have an account, sign in now to post with your account.

Guest
Reply to this topic...

×   Pasted as rich text.   Restore formatting

  Only 75 emoji are allowed.

×   Your link has been automatically embedded.   Display as a link instead

×   Your previous content has been restored.   Clear editor

×   You cannot paste images directly. Upload or insert images from URL.

×
×
  • Create New...