Jump to content

Welcome to TheMalibuCrew!

As a guest, you are welcome to poke around and view the majority of the content that we have to offer, but in order to post, search, contact members, and get full use out of the website you will need to Register for an Account. It's free and it's easy, so don't hesitate to join the TheMalibuCrew Family today!

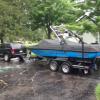
Lenco actuator replacement on 2010's VTX/Module


Till Debt do Us ParT

Recommended Posts

UPDATE...........Yesterday I decided to try and get my wedge to work. Turned out my sensor was not working because the wires were exposed from the coating, thus causing them to cross and not work. (NOTE: I think I did this why replacing the actuators.) So I pulled the rubber plug from the hull that the wires go through. This was no easy task. It had silicone in it and was about an inch long. My brother was pulling from the outside and I was pushing from the inside and finally got it out. The holes in this plug were so small I could not tape up the wire and pull it through so I had to cut the plug off the wires and then tape up each wire individually. It would have been impossible to put the rubber plug back in so I taped up the wires thick enough to just get in the hole. Squirted silicone in the hole, pushed them in and put silicone on the out side and inside around the wires. I will keep an eye on this for water coming in but I think it is sealed very well. Now it was time to calibrate the wedge. Still did not want to go down using the MUX button so I jumped the wires under the helm and got it to go down. Sensor should have read 5-8 when down I was told and it was reading about 120. So I had to take the two screws out of the sensor and rotate it fully around about 6 times before I could get the reading to 0 and the screen to show down. Then I put the two screws back in and raised the wedge up. Now the number was at 200. Pretty close to what the mechanic said it should be. So I went through the calibration process 2 times having to jump the wires to put the wedge down every time. It is calibrated now. The screen shows that wedge is up when it actually is up and down when it is down. The only problem I have left is to figure out why the down button on the MUX does not work. I can at least use my wedge now but would need to jump it to get it down every time. Any suggestions on getting the down button to work? Good news is that the actuators work and are timed right so they don't fight each other during operation.

Link to comment

Sounds like the Mux button is not working. Have you tried to scroll to the next Mux screen and tried the button? I have not done it but there is a way to program the Mux button. You could program a different button for the wedge down function.

Link to comment

I think that is the only screen that has a function in that spot. I will look into programming it into another spot. Thanks for the suggestion.

Now......Does anyone know how to reprogram the MUX buttons?

Link to comment

I'm glad you got it working!

I've been having trouble with either my sensor, or my gauge, and I don't know which. The gauge will sometimes not read correctly, and randomly it will say "wedge is moving up" - even though it's already up.

Does anyone know where we can buy (or if we can buy) and new sensor for the rear?

Link to comment

UPDATE.......I successfully reprogramed the MUX buttons. However, it did not help and I still can't get the wedge to go down without jumping the wires under the helm. It still works going up, reads correctly on the dash and everything else. Anyone have ideas? Not the end of the world but it would be nice to not to have to crawl under and jump it every time I want to put the wedge down.

Link to comment
  • 4 weeks later...

Hey guys!!! Do you solve your problem with Wedge!?

I have the same problems with my Malibu VTX 2009
My old actuators (Power Wedge) was depressurization and broke, so I buy a new one from Lenco, it's fit perfect!
When I put voltage 12V from the battery to the cable (that goes from actuators to under the steering wheel) it's work perfect! Go down and go UP (if I change the polarity)! But when I put contacts to their
place, power Wedge don't WORK! (( I try different presets on the computer, I try to DOWN it from the buttons, I try to choose different
modes (wedge enable, autowedge enable) on the Maliview screen computer, I try to choose Wedge calibration but it still not working.
The fuse is ok. Tell me please, what I must do to correct situation!?
P.S. Sensor works perfect! When I put 12V direct to the wedge wire, and pull it to down or to up, malibuview screen display the position correct!
Link to comment

Do you have a sensor on the wedge? It will be a round black device attached next to the wedge...mine had one and it needed manually calibrated to work properly. Check my pics. There is a shot of it in there.

Link to comment
  • 2 weeks later...

Thanks, I bought his too :thumbup: A couple B1G hookups!!!

I am about to replace my wedge actuators and if you are interested in mine once I pull them off I will set them aside for you.
I will be ordering the new ones this week and hope to replace the old ones in the upcoming weeks to get my wedge working again. Here is where I have found the best price so far: http://www.marinepartssource.com/newdetails.asp?pnumber=LM15060001&mfg=LENCO%20MARINE&desc=4%201/4%20in.%20Stroke%20XD%20Replacement%20Actuator&mfgno=15060-001
Also, where is the best place and most easily accessible place to splice the new ones in at and any tips to make the job easier from those who have done this themselves?
I have the early 2010 with no Lenco control box so I am hoping that the 5 lobe works correctly as a direct replacement.
Link to comment

I need to do this on my boat, did you ever get the buttons to work right? Also is there plugs somewhere on the wires from the actuators or do I just need to cut it and splice it?

Link to comment

i was able to get mine to operate flawlessly. to answer your questions...yes there are plugs/harnesses inside the boat for ea. actuator. the replacements should have the correct harness so you just assemble the harness and clip it to the existing one. I found mine just under the lip of the rear of the boat (drivers side/rear storage). you don't necessarily need to cut the wires on the existing actuator but it makes it a lot easier. I just cut mine a foot past the point there it goes through the hull. (as a finer point spray some WD40 on the line so you can pull it through easier/ do the same with the new as its really tight). there is a simple screw on assembly that the wire threads through the hull with. just unscrew it with your fingers from the outside and save the rubber washer if you can.

if you have the wedge sensor (round black device attached to drivers side of the wedge/see my pics) you will need to calibrate it in order for everything to work correctly. if you don't have the sensor on the wedge I believe you need a new Lenco control box. (mine didn't have one).

I have a word doc that details the sensor adjustment/calibration. if you need it send me your email.

Link to comment
  • 1 month later...

New Power Wedge Sensor Replacement Instructions

Allotted Flat Rate Time: 30 minutes

Required tools:

Stubby #2 Phillips screwdriver

¾” open end wrench

3/8” open end wrench

Wire cutters

Weather-pack Pin removal tool

Parts required- new sensor with round cable #6174026

  • Once you have determined that the sensor needs to be replaced, start by disconnecting the Weather-pack connector in the inside of the transom. Cut the wires behind the connector on the sensor cable. (see figure #1) You will reuse the black connector block on the new sensor. Unlock TPA and fold it back. (see figure #2) Push the old terminals out of the connector with a pin removal tool. (see figure #3)

  • Spray some silicone or other lubricant on the cable that you will be pulling out thru the transom.

  • Remove the two screws that hold the sensor in place.

  • Loosen the adel clamp at the top of the Wedge bracket so you can pull the cable thru.

  • Loosen and remove the plastic nut on the watertight seal (PG-9). (see figure #4)

  • Pull the cable out of the PG-9. You will reuse the black plastic nut and the rubber seal on the new sensor cable.

  • Once the old sensor has been removed, spray some silicone or other lubricant into the PG-9 seal.

  • Slide the black plastic nut and then the rubber seal onto the new sensor cable. (see figure #5)

  • Route the new sensor cable thru the adel clamp at the top of the bracket.

  • Insert the terminals thru the P-G9 one at a time; they will not fit if pushed together.

  • Get back inside the boat and pull some of the slack, just enough to connect it to the boat harness.

  • Insert the terminals of the new sensor into the old connector block. These wires are not polarity sensitive. Ether way will work fine.

  • Connect the new sensor to the boat harness connection. Don’t tie it up just yet.

  • Turn on the ignition, press the set-up button, then scroll down to Wedge Calibration, press enter.

  • You will need to watch the Raw value or top number on the calibration screen as you move the axle of the sensor.

    Adjust the axle of the sensor to a value of 20 on the dash before installing the two screws. Once installed you can fine tune the sensor to a value between 18-25 then tighten the screws on the sensor.

  • Push the excess cable slack thru the transom & PG-9. Leave enough slack for the sensor to rotate 90*.

  • Tighten the nut on the PG-9, don’t over tighten, and then tighten the adel clamp.

  • Go back inside the boat and tie up the new cable with wire ties.

  • Finnish the job by calibrating the Power Wedge.

Link to comment
  • 9 months later...

Does anyone have have an old actuator that I could part out?  I hit a log this past weekend and it broke one of the actuators end cap hole that attaches the actuator to the one side.  There are 2 screws there and I'm hoping if I find a new end cap I can just replace that as both actuators are still working and the wedge will go up and down.  Please message if you have one you want to sell...

Link to comment
  • 2 years later...
  • 1 year later...
On 8/10/2015 at 7:57 AM, Till Debt do Us ParT said:

i was able to get mine to operate flawlessly. to answer your questions...yes there are plugs/harnesses inside the boat for ea. actuator. the replacements should have the correct harness so you just assemble the harness and clip it to the existing one. I found mine just under the lip of the rear of the boat (drivers side/rear storage). you don't necessarily need to cut the wires on the existing actuator but it makes it a lot easier. I just cut mine a foot past the point there it goes through the hull. (as a finer point spray some WD40 on the line so you can pull it through easier/ do the same with the new as its really tight). there is a simple screw on assembly that the wire threads through the hull with. just unscrew it with your fingers from the outside and save the rubber washer if you can.

if you have the wedge sensor (round black device attached to drivers side of the wedge/see my pics) you will need to calibrate it in order for everything to work correctly. if you don't have the sensor on the wedge I believe you need a new Lenco control box. (mine didn't have one).

I have a word doc that details the sensor adjustment/calibration. if you need it send me your email.

Hey!  So my wedge wouldn’t go up either.  I changed my actuators out and still won’t.  I also don’t have a Lenco box and instead have a sensor in the wedge.  The only way I can get it to go back is to switch my wires around to change the polarity.  What do you think the problem is?  Dealership hasn’t even heard of a Malibu without a lenco box!  I tried to tell them I don’t have one and that I know others don’t either as I’ve seen it on multiple threads now.  How would I know that my sensor isn’t working properly?

Link to comment

Join the conversation

You can post now and register later. If you have an account, sign in now to post with your account.

Guest
Reply to this topic...

×   Pasted as rich text.   Restore formatting

  Only 75 emoji are allowed.

×   Your link has been automatically embedded.   Display as a link instead

×   Your previous content has been restored.   Clear editor

×   You cannot paste images directly. Upload or insert images from URL.

×
×
  • Create New...